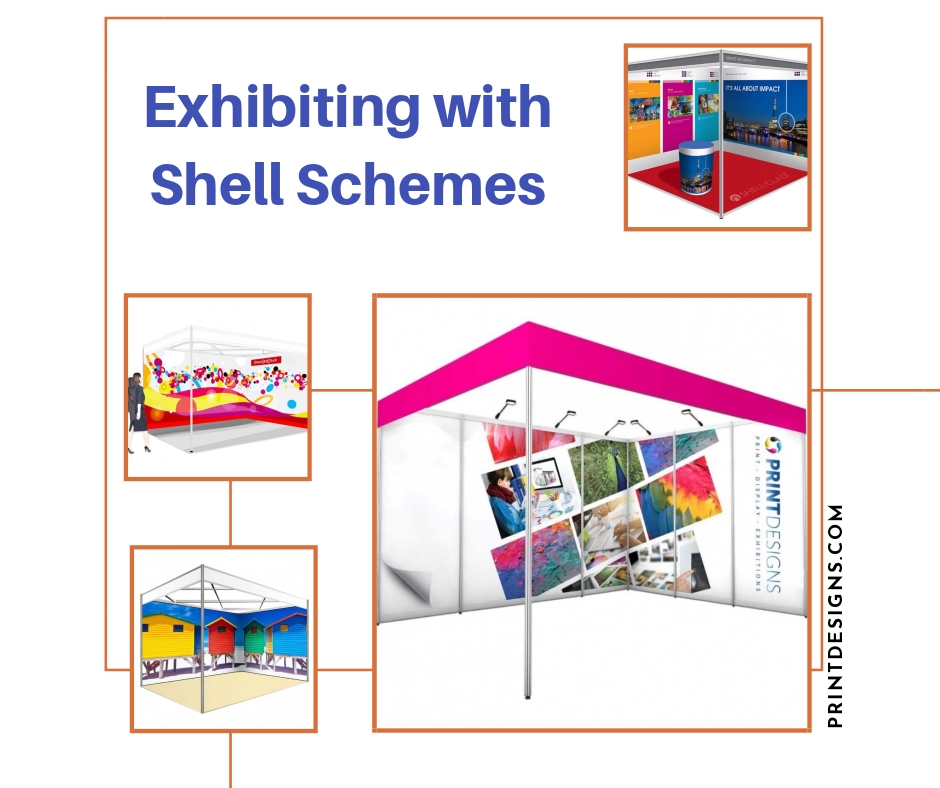
A Printdesigns Guide To Making The Most Impact With A Shell Scheme
Exhibition checklist:
Pamphlets to hand out…check.
Free pens to give away…check.
Samples of your new widgets…check.
Eye-catching visuals for the stand…
As people walk up and down the exhibition hall, research says that in the first five seconds someone sees a stand, they’ve already decided if it’s of interest to them or not.
That’s right.
You’ve got five seconds or less to make an impression. 5 seconds to ensure they don’t carry on and walk right past.
So, it goes without saying then that the more visually appealing a stand is, the more chance you have of pulling in the prospective customers.
Fortunately, there are a number of ways to make the most out for your exhibition floor space.
Shell Scheme Graphics

An exhibition hall is split up into different areas. There’s the main space where an exhibitor will have nothing but floor to work with (we’ll cover this in a future post), and an area that is taken up by pre-erected booths.
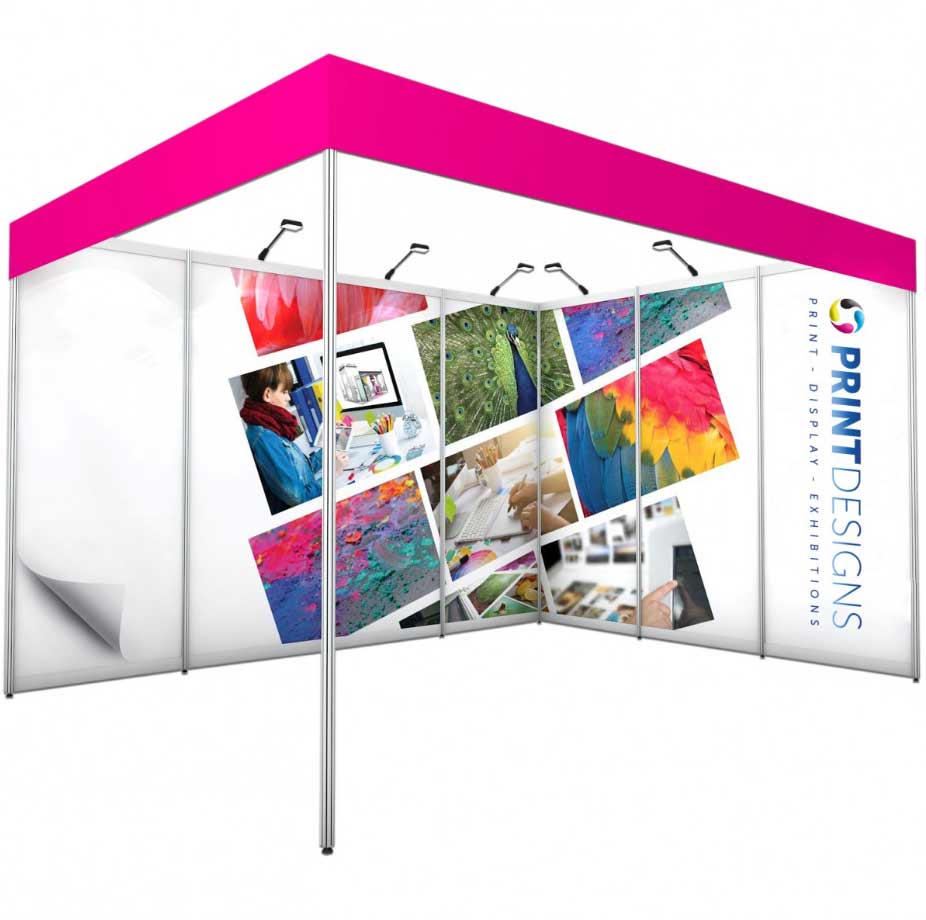
The show’s organisers call the mini-booths ‘shell schemes’ because, in essence, you’re getting an empty shell that’s ready for your individual visuals. There will be one, two or three sides to cover with graphics and the space on the ground.
Just because these booths are a standard size and layout doesn’t mean that your individual touch needs be standard as well.
Think of a shell scheme as a blank canvas and let your imagination loose!
The panels in a shell scheme are usually around 1m wide x 2.5m high. Think of these as the building blocks of your design and use each panel individually or perhaps consider designing a large graphic to cover multiple panels in one-piece (see Shell-Clad below).
From soft display fabrics to rigid foam PVC, there are many substrate choices to print the graphics panels onto.
Don’t just think of which looks more appealing.
Think of panel weight – are you having to lug the panels around to different exhibitions? How are the panels being stored between exhibitions? Are they for a one-off exhibition or ongoing?
If you’re unsure as to which substrate is ideal for promoting your brand, get in touch and we’ll help guide you through the options.
Attaching the graphic panels to the shell scheme is normally done by Velcro. Hooks on one side and loops on the other keep the panels in place for the duration of the exhibition and means easy removal once the days are finished.
For more info on printed shell scheme graphics, click here.
Shell Clad Systems & Graphics
The next step up from individual graphic panels is the Shell Clad system.
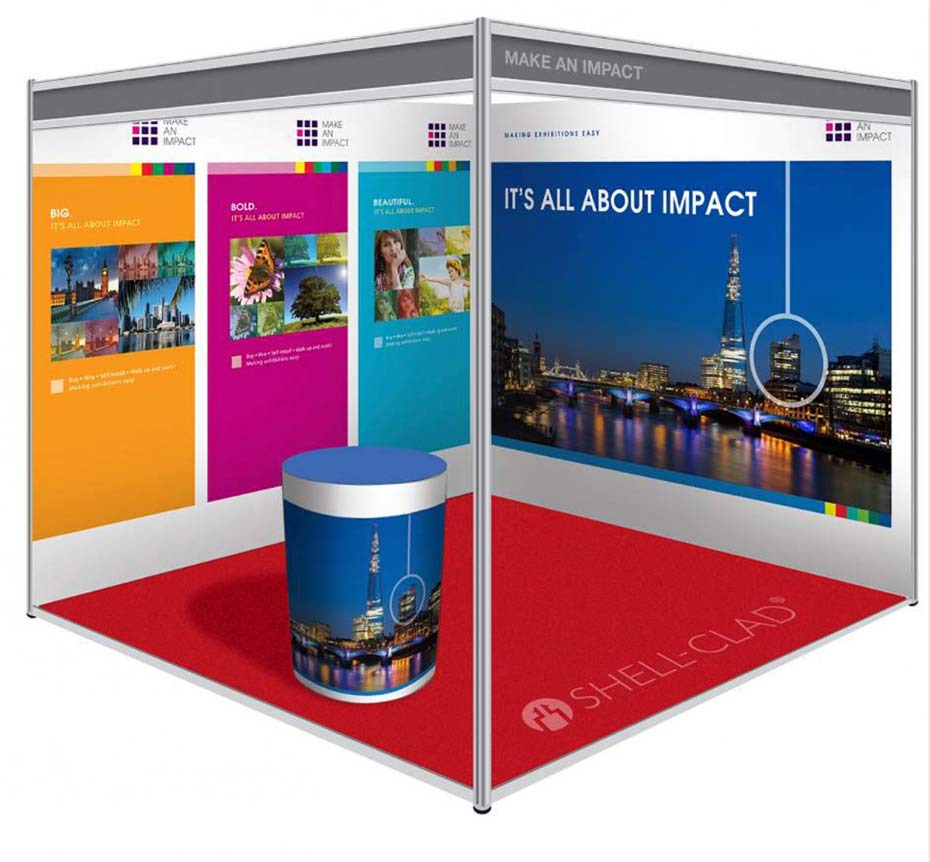
Shell Clad provides a method of fixings graphics to almost any exhibition shell scheme and allows the printed panels to butt-up edge to edge. The capability to butt-up panels without gaps in-between allows for much more creativity in terms of the design of the panels. With shell clad you can create murals of artwork and display it on the walls of your booth as one continuous spread rather than a series of individual panels.
So, how does it work?
Shell Clad adapter clips are simple, plastic adapters that snap-into place on the upright posts of the shell scheme. The adapters are covered in velcro that provides a receptive surface onto which your graphic panels attach.
Graphics are produced to specific sizes dependent on the type of exhibition shell scheme that you have. When attached to the adapter clips, the panels form one image that encapsulates the whole wall of the stand providing a high-impact visual.
If a Shell Clad system is right for your next exhibition, we’ve got costs and further information here.
Curvorama Shell Scheme Kit
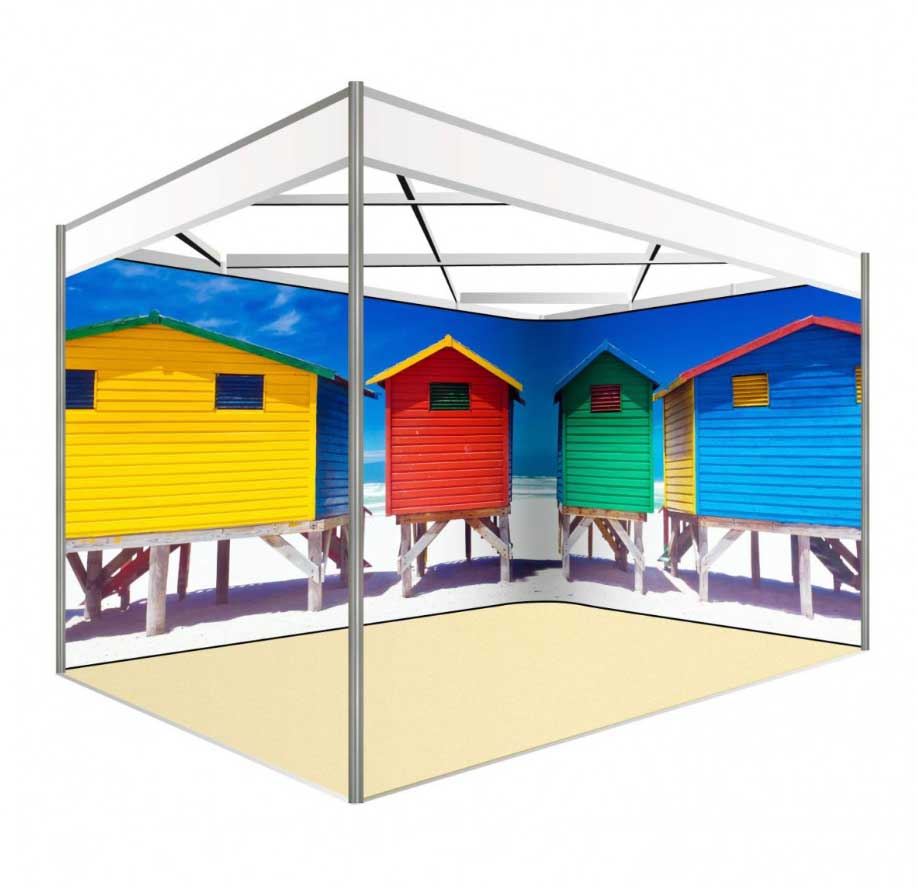
Curvorama works on a similar idea to the Shell Clad system but utilises a different method of attaching the panels.
Rather than attaching to the vertical posts of the stand, adapters hook over the top and bottom cross beams of a shell scheme and tension vertically between the clips to keep the print taut and in position.
With Curvorama, multiple panels overlap slightly to create an eye-catching seamless graphic wall. When the show is over these panels can be rolled up for transportation and the fixings are a universal fit with all types of shell scheme so you can re-use the graphics at multiple events regardless of the type of shell scheme that you are provided with.
Curvorama’s benefits don’t stop at the shell scheme though. It is also available with optional legs and feet that turn the system to a free-standing display. Ideal if you decide to participate at some events whereby you are not provided with an exhibition shell scheme!
If it does fit the bill, find out more on Curvorama here.
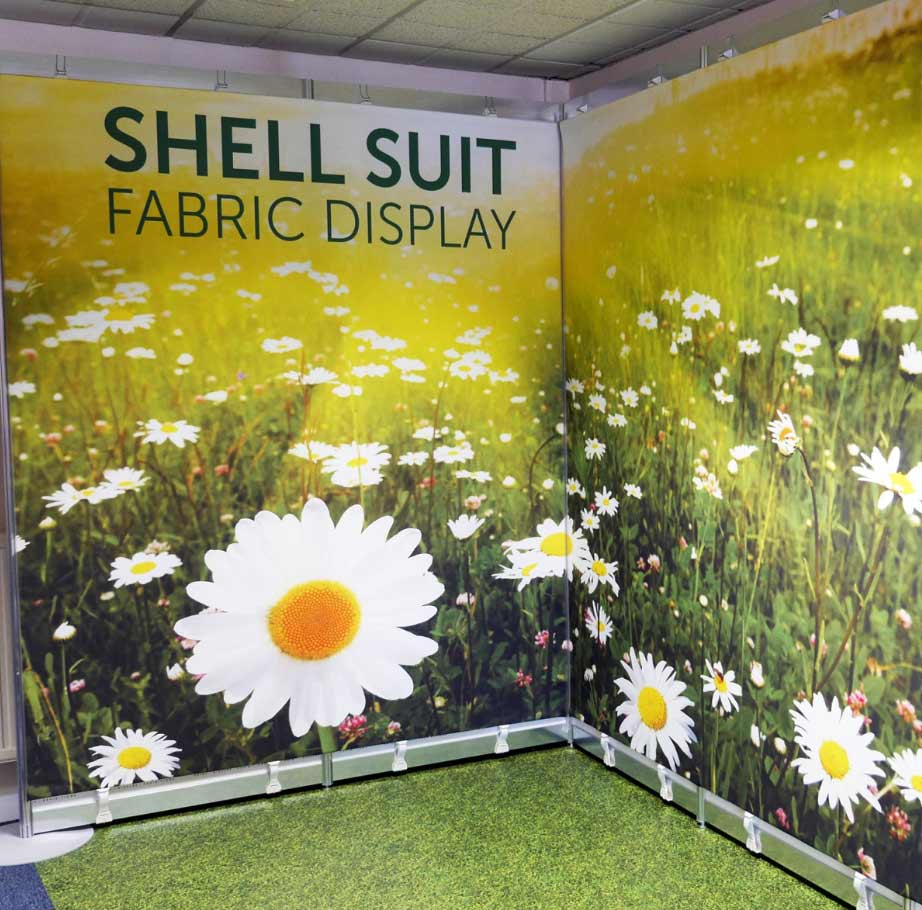
ShowSuit Shell Scheme Graphics
Although both Shell Clad and Curvorama allow multiple panels to be butted up or overlapped in order to provide the appearance of a continuous mural graphic, there are seams between the panels that are not invisible.
ShowSuit graphics are printed onto display fabric and provide a truly seamless solution to graphic walls since the panel can be printed in one continuous run to fit the wall of the booth.
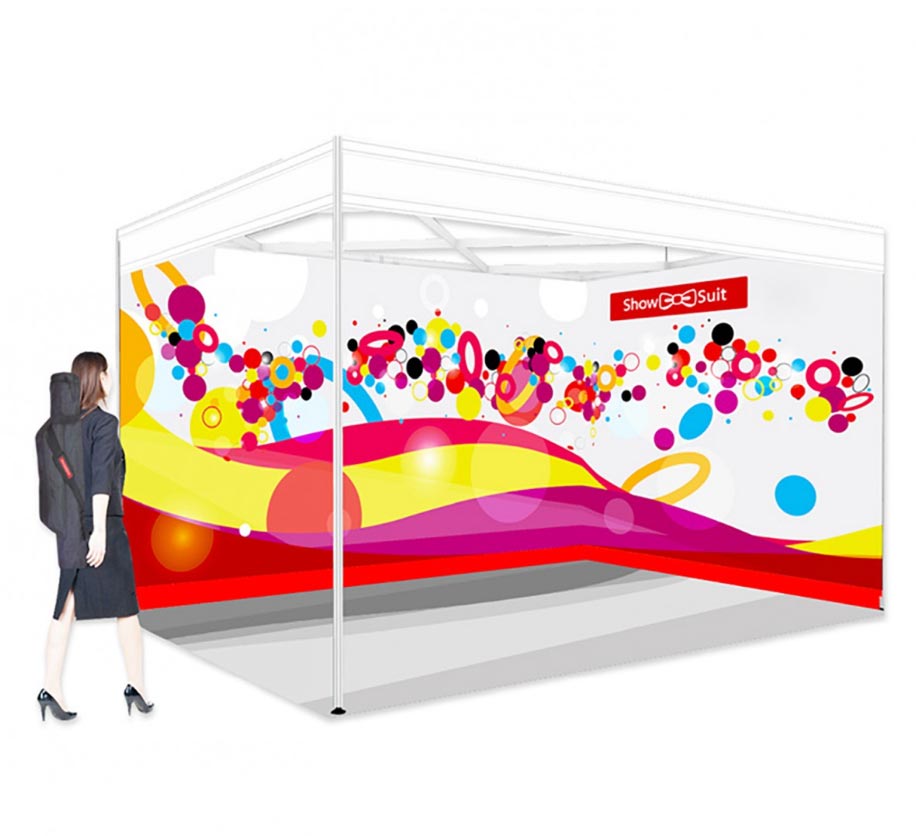
ShowSuit’s printed polyester fabric is clamped between aluminium rails at the top and bottom of the print and the same adapters as Curvorama fit to the shell scheme’s aluminium cross beams to support it.
To stop any sag, vertical tension is achieved by pulling a cord at the bottom of the graphic. Horizontal tension comes courtesy of push-fitting a silicone bead into the shell scheme’s upright post.
ShowSuit has been fully tested with Octanorm shell schemes. If your show organiser uses a different scheme, let us know the details and we’ll make sure your new system works.
Need to see it in action? Have a watch of the assembly video on our ShowSuit page here.
T3 Shell Kit
The last option for shell scheme graphics is the T3 system.
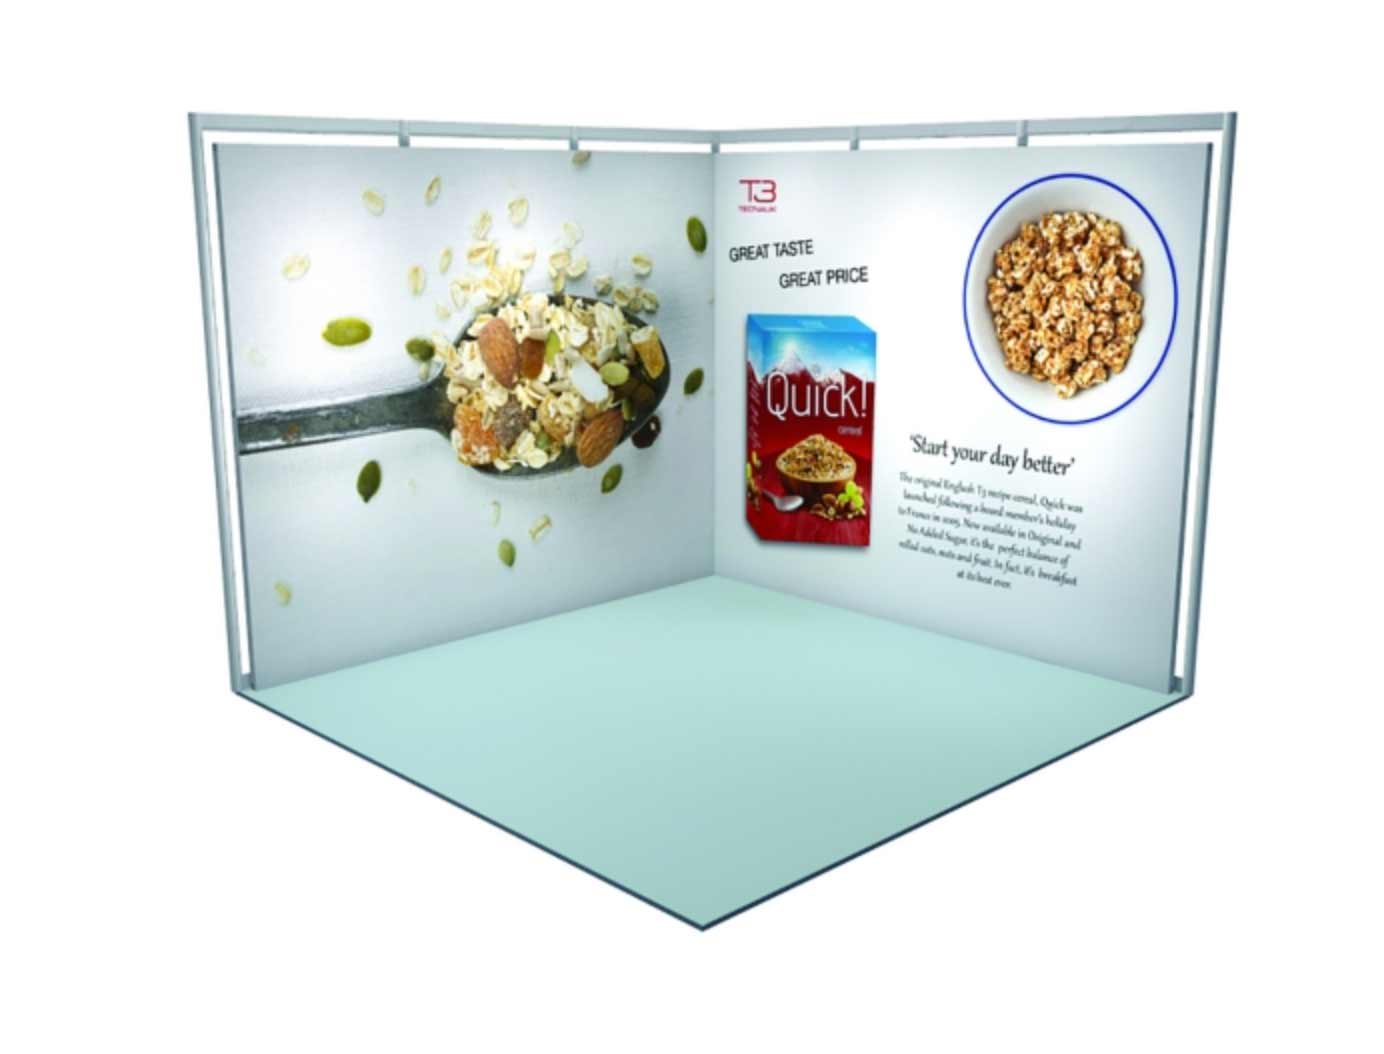
The T3 Shell Kit consists of a frame that goes within the existing shell scheme and the graphics are simply attached to the frame.
Options for the graphics include non-crease easy-fit fabrics through to solid foamex panels and crystal textured anti-scuff films.
The T3 uses adapters to fit securely to the shell scheme aluminium frame and even though it’s built within the existing booth, it only takes up 60mm in depth. The T3 Shell system really shines when you’re exhibiting in numerous location. The size of the frame can be adjusted by adding or removing sections as and when necessary.
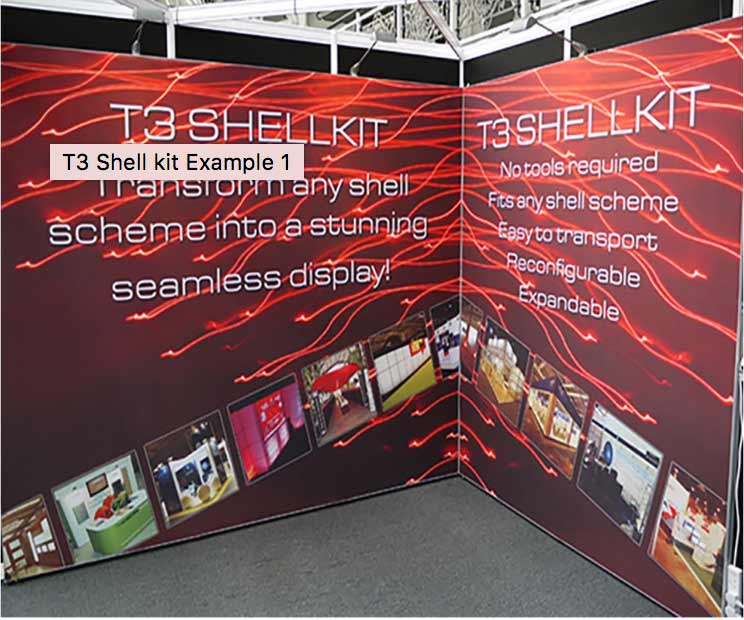
With no compatibility issues, the T3 Shell Kit can be used at any exhibition worldwide.
We’ve got an assembly video here showing the T3 and how it works.
That’s all the options for shell schemes covered.
We’re sure there’s one to fit in with your vision whether you need simplicity, cost-effectiveness or reusability.
If you still need some impartial advice, let us know and we’ll help you (in plain English) to find the one that is right for you.
The only thing left to do is put together your message and branding!
Fortunately, we’ve even got 5 design tips for making the most impact with your shell scheme graphics.
- Be Bright! Make sure you stand out by using colour. Don’t sink into the background with greys and neutrals.
Even though your logo and corporate colours may not be the boldest, add a splash of colour to your design to catch that prospective customer’s eye. - Make Sure It’s Legible! Don’t design it with 16pt text and whatever colours you do use, ensure they can be easily read against the background.
Both the images and the text need to be super sharp and clear. If it looks unprofessional, I’m carrying on walking! - 3. Use Images. Speaking of clear images, make sure you use them. No shell scheme should have a wall of text and certainly, no-one is going to read it. Informative or inspirational images and graphics work wonders. Remember, a picture can paint a thousand words and at a quick glance, your brand needs to say something about you.
- 4. Don’t Confuse! Make sure it makes sense! Use images and graphics that match your theme or brand, not just because they look cool. Think about what you want to convey (keep a brand book) and incorporate this into your design.
- 5. Keep On Brand. Don’t sell socks and use images of sports cars! In that quick glance, the passerby needs to know who you are and what you can do for them. Don’t make promises with your exhibition graphics that you know as a company you can’t keep.
Keep to these five tips, look to one of the shell scheme systems outlined above, and happy exhibiting!